CIS Benchmark Linux Hardening Guide: 6 Critical Steps to Pass Security Audits Without Breaking Production
Written by Thomas C (20+ Years Enterprise Linux Engineering)
Published by OS Assistance — Dedicated Linux Systems Care & Enterprise Hardening
In today’s regulatory climate—whether preparing for SOC 2 Type II, ISO 27001, PCI-DSS 4.0, or HIPAA certification—the Center for Internet Security (CIS) Benchmarks represent the global gold standard for operating system defense. Auditors routinely demand proof that Linux hosts conform to Level 1 or Level 2 benchmark profiles.
Yet, in enterprise environments, security compliance often collides with operational stability: an inexperienced administrator blindly applies a generic CIS remediation script, locks down PAM or kernel network parameters, and instantly breaks production database clusters, monitoring agents, or client SSH access.
True enterprise hardening is not about blindly flipping every toggle to “strict.” It is about understanding the architectural impact of each rule, applying non-destructive remediations, and maintaining verifiable version control.
Drawing on more than 20 years of enterprise Linux systems architecture across Fortune 500 organizations (IBM, UPS, Deloitte) and Tier-1 banking environments—backed by CISSP, ITIL, and TOGAF frameworks—I have structured this CIS benchmark Linux hardening guide to help engineering teams lock down their infrastructure safely and pass compliance audits with confidence.
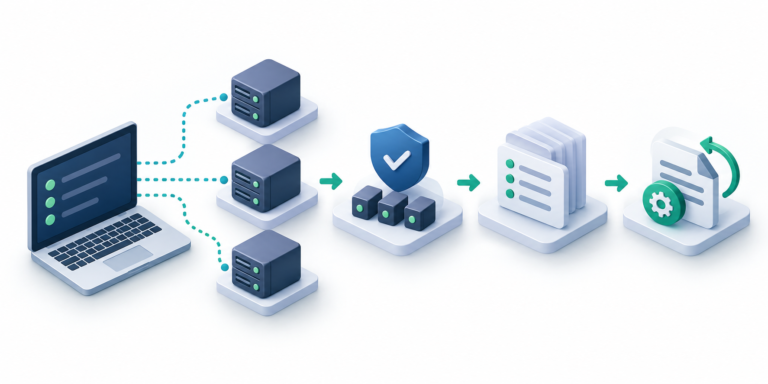
+-------------------------------------------------------------------------+
|             THE 6-LAYER PRODUCTION LINUX HARDENING ARCHITECTURE         |
+-------------------------------------------------------------------------+
|                                                                         |
|  [LAYER 1: FILESYSTEM MOUNT FLAGS]                                      |
|   • nodev, nosuid, noexec on /tmp, /dev/shm, /var/tmp                   |
|   • Sticky bit enforcement on world-writable directories                |
|                  │                                                      |
|                  ▼                                                      |
|  [LAYER 2: KERNEL ATTACK SURFACE & SYSCTL]                              |
|   • Disable core dumps (fs.suid_dumpable = 0)                           |
|   • Network stack: TCP SYN cookies, RFC 1337, disable ICMP redirects   |
|   • ASLR enforcement (kernel.randomize_va_space = 2)                    |
|                  │                                                      |
|                  ▼                                                      |
|  [LAYER 3: ACCESS CONTROL & PAM]                                        |
|   • Password hashing (SHA-512 / yescrypt)                               |
|   • PAM account lockout policies (pam_faillock / pam_tally2)            |
|   • Strict sudoers auditing & elimination of NOPASSWD                   |
|                  │                                                      |
|                  ▼                                                      |
|  [LAYER 4: SECURE OPENSSH CONFIGURATION]                                |
|   • Force Protocol 2, disable root login (PermitRootLogin no)           |
|   • Strong cryptographic ciphers (ChaCha20-Poly1305, AES-GCM)           |
|   • Strict MACs and Key Exchange algorithms (curve25519)                |
|                  │                                                      |
|                  ▼                                                      |
|  [LAYER 5: AUDIT LOGGING & AUDITD POLICIES]                             |
|   • Immutable kernel audit rules (-e 2)                                 |
|   • Track user authentication, privilege escalation, file mutations     |
|   • Log retention & immutability safeguards                             |
|                  │                                                      |
|                  ▼                                                      |
|  [LAYER 6: AUTOMATED COMPLIANCE VERIFICATION]                           |
|   • Non-destructive Lynis auditing & OpenSCAP scanning                  |
|   • Git-tracked Ansible baseline configurations                         |
|                                                                         |
+-------------------------------------------------------------------------+
Step 1: Secure Filesystem Partitions and Mount Options
The first layer in any comprehensive CIS benchmark Linux hardening guide begins at the storage mount level. Unprivileged users and compromised web applications frequently attempt to compile and execute exploit binaries within world-writable directories such as /tmp or /dev/shm.
Restricting execution and privilege escalation at the filesystem mount layer eliminates entire classes of local exploits before they can start.
Production Mount Configurations (/etc/fstab)
Ensure dedicated mount points exist for temporary directories, and apply nosuid, nodev, and noexec:
# Verify current mount options
mount | grep -E '\s/(tmp|var/tmp|dev/shm)\s'
Add or adjust mount parameters in /etc/fstab:
# /etc/fstab hardened entries
tmpfs       /dev/shm    tmpfs   defaults,nodev,nosuid,noexec    0 0
/dev/mapper/vg0-tmp     /tmp    ext4    defaults,nodev,nosuid,noexec    1 2
/tmp        /var/tmp    none    bind,nodev,nosuid,noexec        0 0
Remount filesystems without rebooting:
sudo mount -o remount,nodev,nosuid,noexec /tmp
sudo mount -o remount,nodev,nosuid,noexec /dev/shm
Operational Warning: Certain database installation scripts (e.g., Oracle, SAP) or package compilers require executing temporary binaries from
/tmp. If an approved operational maintenance window requires execution, temporarily remount withexec, complete the installation, and immediately reinstatenoexec.
Step 2: Kernel Network Stack & System Parameter Hardening (sysctl)
Default Linux kernel settings prioritize backward compatibility and loose networking environments over security. In production cloud servers (AWS, Azure, Hetzner, GCP), disabling IP forwarding, packet redirects, and source routing prevents hosts from being used as routing hops or victimized by spoofing attacks.
Hardened Kernel Parameters (/etc/sysctl.d/99-cis-hardening.conf)
Deploy a consolidated configuration drop-in file:
# -------------------------------------------------------------------
# CIS Benchmark Kernel & Network Hardening
# Managed by OS Assistance Configuration Management
# -------------------------------------------------------------------

# Memory Protection & Core Dumps
kernel.randomize_va_space = 2
fs.suid_dumpable = 0

# Disable Packet Routing & Forwarding (For non-router servers)
net.ipv4.ip_forward = 0
net.ipv6.conf.all.forwarding = 0

# Reject ICMP Redirects (Prevent MITM Route Poisoning)
net.ipv4.conf.all.accept_redirects = 0
net.ipv4.conf.default.accept_redirects = 0
net.ipv4.conf.all.send_redirects = 0
net.ipv4.conf.default.send_redirects = 0
net.ipv6.conf.all.accept_redirects = 0
net.ipv6.conf.default.accept_redirects = 0

# Ignore Source Routed Packets
net.ipv4.conf.all.accept_source_route = 0
net.ipv4.conf.default.accept_source_route = 0
net.ipv6.conf.all.accept_source_route = 0
net.ipv6.conf.default.accept_source_route = 0

# Enable Reverse Path Filtering (Spoofing Protection)
net.ipv4.conf.all.rp_filter = 1
net.ipv4.conf.default.rp_filter = 1

# TCP SYN Flood Protection
net.ipv4.tcp_syncookies = 1
net.ipv4.tcp_max_syn_backlog = 2048
net.ipv4.tcp_synack_retries = 2

# Protect Against TIME-WAIT Assassination (RFC 1337)
net.ipv4.tcp_rfc1337 = 1

# Log Suspicious (Martian) Packets
net.ipv4.conf.all.log_martians = 1
net.ipv4.conf.default.log_martians = 1
Load and verify the kernel settings immediately:
sudo sysctl -p /etc/sysctl.d/99-cis-hardening.conf
Step 3: Pluggable Authentication Modules (PAM) & Password Governance
Compromised or brute-forced local user accounts represent a primary vector for lateral movement. The CIS benchmark mandates strict password complexity, cryptographic hashing algorithms, and automated account lockout thresholds after consecutive failed authentication attempts.
1. Hashing Algorithm Enforcement
Ensure password hashing utilizes modern SHA-512 or Yescrypt rather than legacy MD5 or DES.
Verify /etc/pam.d/common-password (Debian/Ubuntu) or /etc/pam.d/system-auth (RHEL/Rocky/Alma):
password [success=1 default=ignore] pam_unix.so sha512 shadow nullok rounds=65536
2. Account Lockout Configuration (pam_faillock)
Protect against brute-force attacks by locking user accounts after 5 failed authentication attempts for 15 minutes:
In /etc/security/faillock.conf:
# Account lockout after 5 consecutive failures
deny = 5
fail_interval = 900
unlock_time = 900
even_deny_root = false
Step 4: Enterprise OpenSSH Service Lockdown
OpenSSH is the front door to your Linux infrastructure. A compliant CIS benchmark Linux hardening guide mandates eliminating password authentication in favor of Ed25519 or RSA 4096-bit public keys, terminating idle sessions, and enforcing cryptographic cipher suites.
Hardened OpenSSH Configuration (/etc/ssh/sshd_config.d/01-cis-sshd.conf)
# -------------------------------------------------------------------
# CIS OpenSSH Server Baseline
# -------------------------------------------------------------------

# Network Protocol & Port
Port 22
Protocol 2

# Authentication Security
PermitRootLogin no
MaxAuthTries 3
PubkeyAuthentication yes
PasswordAuthentication no
PermitEmptyPasswords no
AuthenticationMethods publickey

# Session Timeouts & Termination
ClientAliveInterval 300
ClientAliveCountMax 2
LoginGraceTime 60

# Forwarding Controls
X11Forwarding no
AllowTcpForwarding no
AllowAgentForwarding no

# Modern Cryptographic Ciphers & MACs (Disallowing CBC and weak ciphers)
Ciphers [email protected],[email protected],[email protected]
KexAlgorithms curve25519-sha256,[email protected],diffie-hellman-group16-sha512,diffie-hellman-group18-sha512
MACs [email protected],[email protected],[email protected]

# Banner Warnings for Unauthorized Users
Banner /etc/issue.net
Always test the daemon syntax before restarting:
sudo sshd -t && sudo systemctl reload sshd
Step 5: System Auditing with auditd and File Integrity Monitoring
Auditors do not simply inspect configuration files; they require tamper-proof historical evidence demonstrating that unauthorized administrative actions and privilege escalations are logged and alerted in real time.
The Linux Audit daemon (auditd) runs directly in kernel space, capturing system calls, privilege changes, and file mutations.
Baseline Audit Rules (/etc/audit/rules.d/cis-audit.rules)
## First delete all existing rules
-D

## Set buffer size
-b 8192

## Failure mode: 1 = syslog message, 2 = kernel panic
-f 1

## Monitor changes to system time and date
-a always,exit -F arch=b64 -S adjtimex,settimeofday -k time_change
-a always,exit -F arch=b64 -S clock_settime -k time_change
-w /etc/localtime -p wa -k time_change

## Monitor identity and authentication files
-w /etc/group -p wa -k identity_changes
-w /etc/passwd -p wa -k identity_changes
-w /etc/gshadow -p wa -k identity_changes
-w /etc/shadow -p wa -k identity_changes
-w /etc/security/opasswd -p wa -k identity_changes

## Monitor system network environment configuration
-a always,exit -F arch=b64 -S sethostname,setdomainname -k system_locale
-w /etc/issue -p wa -k system_locale
-w /etc/issue.net -p wa -k system_locale
-w /etc/hosts -p wa -k system_locale
-w /etc/network/ -p wa -k system_locale

## Monitor privilege escalation and sudo usage
-w /etc/sudoers -p wa -k sudoers_changes
-w /etc/sudoers.d/ -p wa -k sudoers_changes

## Make audit configuration immutable (Must be last rule; requires reboot to alter)
-e 2
Reload the audit configuration and verify active watchers:
sudo augenrules --load
sudo auditctl -l
Step 6: Automated Security Auditing & Continuous Baseline Drift Detection
Hardening is not a one-time project; it is an ongoing operational practice. System updates, emergency manual hotfixes, and package installations often re-introduce permissive permissions or default configuration files.
1. Perform an Automated Lynis Security Scan
Lynis is the premier open-source CIS and security audit tool for enterprise Linux environments:
# Install Lynis
sudo apt-get install lynis  # Debian/Ubuntu
sudo dnf install lynis      # RHEL/Rocky/Alma

# Execute complete system audit without interactive prompts
sudo lynis audit system --quick
Review the resulting Hardening Index score (target: 80+) and inspect /var/log/lynis-report.dat for prioritized warnings and suggestions.
2. Enforce Baselines via Version-Controlled Ansible
Rather than manually applying hardening commands across dozens of nodes, maintain an idempotent Ansible role in Git:
---
# tasks/hardening_baseline.yml
- name: Ensure CIS kernel parameters are set
  ansible.posix.sysctl:
    name: "{{ item.key }}"
    value: "{{ item.value }}"
    state: present
    sysctl_file: /etc/sysctl.d/99-cis-hardening.conf
    reload: yes
  loop:
    - { key: 'net.ipv4.ip_forward', value: '0' }
    - { key: 'net.ipv4.tcp_syncookies', value: '1' }
    - { key: 'fs.suid_dumpable', value: '0' }

- name: Enforce strict OpenSSH configuration
  ansible.builtin.template:
    src: templates/01-cis-sshd.conf.j2
    dest: /etc/ssh/sshd_config.d/01-cis-sshd.conf
    owner: root
    group: root
    mode: '0600'
    validate: '/usr/sbin/sshd -t -f %s'
  notify: Reload SSHD
Need Enterprise Linux Hardening & Audit Assistance?
Achieving and maintaining compliance across complex production fleets requires disciplined operating system architecture and continuous oversight. If your organization is preparing for a SOC 2 audit, responding to client vendor security questionnaires, or seeking to harden your cloud infrastructure, OS Assistance provides tailored technical engagements:
1. Linux Server Care Memberships ($25 – $59 / month)
Ensure your cloud instances and virtual machines receive continuous monthly security updates, kernel patching, uptime monitoring, and preferred $65/hour incident support:
👉 Explore Linux Server Membership & Care Plans
2. Dedicated SFTP Support & Secure File Transfer Services
Hardened, chrooted ingress environments paired with automated PGP payload encryption for banking, insurance, and logistics compliance:
👉 Explore SFTP Support & Secure File Transfer Services
3. Linux Care — Unlimited Fleet Operations ($4,000 / month)
For high-growth SaaS companies, digital agencies, and tech-driven enterprises requiring an embedded, senior Linux systems architect with 20+ years of Fortune 500 engineering experience:
- Unlimited Linux servers covered under management.
- One active workstream at a time: We systematically audit, harden, automate, and document your server estate sequentially.
- Zero hourly rates for routine operational requests and configuration management.
- Triage & response plan within 24 business hours.
👉 Learn More About Linux Care at OS Assistance
Schedule an Infrastructure Compliance Consultation
Speak directly with our senior Linux architect to assess your current security posture, review CIS benchmark compliance, and plan a non-destructive hardening roadmap:
👉 Book an Infrastructure Consultation at OS Assistance
Intellectual Property & Copyright Notice
© 2026 OS Assistance (osassistance.com). All rights reserved. This technical publication, including its sysctl profiles, PAM governance strategies, audit rules, and Ansible automation architectures, constitutes proprietary intellectual property. Unauthorized reproduction, automated syndication, or scraping without prior written consent from OS Assistance is strictly prohibited under international copyright law.